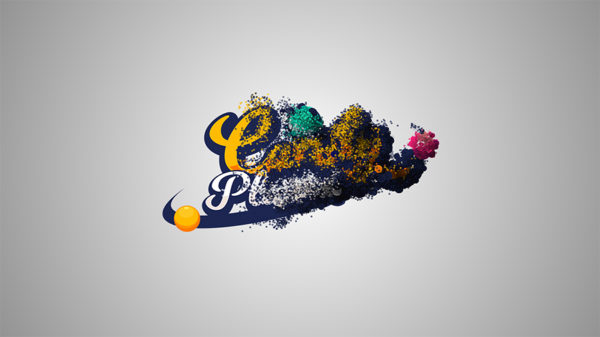
In this tutorial, I will show you how to create a logo reveal using the Particular plugin, and instead of particles will use a text layer with different words in it, related to our project. What will you need? The Trapcode Particular plugin, the will to learn something new, and a list of 10 words related to your subject.
Download the Projec Files Subscribe to my Channel Download the Template
Text Formation Logo Reveal Tutorial Transcript
Hey, welcome back to my new video. This is EZ tutorials, and for those of you who are the first time in this channel, please consider subscribing. Today we’ll be creating a text formation logo reveal.
Before we start, I’d like to invite you to support me on Patreon. You can also get access to all my premium content. In this tutorial will be using the EZ Tools script, which is free to download. So let’s start.
Import the files you need into After Effects. You can download the project files and the template separately, this way you will be able to create this wonderful text formation logo reveal even if you don’t want to download my template. You can find both links in the description.
Create a new composition and name it: logo reveal. I’m using a FULL HD 1080 pixels preset, with 30 frames per second, and 15 seconds long.
Create a new black solid, and apply the Fill effect to it. Create another black solid. Bring the color palette file into your composition. Select the bottom solid layer, open the effect controls panel, and change the fill color to this color. Select the second solid layer, find the ellipse tool, and double click it, to create a mask on your layer. Select the inverted box, open mask 1, change the mask feather to 1000, and the mask expansion to 150. Select both solid layers, pre-compose them, and name the new composition background.
In the character panel, change the text color to this color, then, you can delete the color palette file.
Create a new composition, and name it text. Make it 410 by 200 pixels, and 10 frames long. I will explain you right away why we need these settings. You should have in mind a couple of words related to your project, so, grab the horizontal type tool, and start writing your first word. I am using the Gotham font family, which is free to download, with a size of 65 pixels. Align your text to the center, open the text options, click text, and create a keyframe on the source text. Move 1 frame forward, and change the text to your second word. Move 1 more frame, and change it to the third word, and so on…
The most important is to have words that fit in this comp size. If you have larger words, you can make this comp size a little bigger, but no more than 500 by 500 pixels, so it can be used with the particular plugin. I have a total of 10 words, 1 for each frame, that’s why I made the text composition 10 frames long. You can make yours as long as you need, according to the number of words you use. Don’t use 1 word for more than 1 frame.
Go back to your logo reveal composition, and bring the text comp under the background layer, then make it invisible, just in case. Select the horizontal type tool, and start writing your logo text. Make sure that your text layer it’s at the top, then, change the font size to around 300 pixels. Align the text to the center, pre-compose it, and name the new composition logo. Make it 3D, then open it.
Create a new adjustment layer, search for levels and apply it to your layer. Change the channel to alpha, the alpha input black value to 124, and the alpha input white value to 125.
Go back to your logo reveal composition, create a new black solid, and name it floor. Make it 3D, and place it at the bottom of your composition. Open its position options, and change the Z position value to 600.
Create a new black solid, and name it particles. Now, will have to use the Trapcode Particular plug-in, which, as you know, is a paid plugin. For those who don’t have it yet, go to the Red Giant official website, and download the trial version. You can find the link in the description. Search for particular, and apply it to your layer.
Open the emitter, create a keyframe on particles per second, and change the value to 0. Move to 1 second and 10 frames, and change the value to 5000. Move to 3 seconds, reveal the properties with keyframes, and create a hold keyframe, then, move to 7 seconds, and change the value to 0. Easy ease this last keyframe, open the graph editor, and change the curve like this. Change the emitter type to layer, open the layer emitter, and set the layer to logo, change direction to directional, direction spread to 0%, Y rotation to 180 degrees, velocity to 700, and velocity random to 30%.
Open particles, change life to 15 seconds, particle type to sprite, open texture, set the layer to text, and change the layer sampling to random still frame. Change the size to 25, the size random to 30%, the opacity to 90, and the opacity random to 20%. You can make your logo layer invisible now.
Open the physics, change the physics model to bounce, open bounce, set the floor layer to floor, and change the collision event to stick. Open visibility, change the near start fade value to 180, and the near vanish value to 30.
Create a new cam. I will use a one node camera, with the 50 millimeters preset. If your image becomes blurry like mine, open the camera, click on camera options, and switch off the depth of field. Open the camera’s position options, move to 11 seconds, and create a keyframe, then, move to the last frame, and change the Z position to 600. Select both keyframes and easy ease them, then open the graph editor, and change the curve like this.
Select the logo layer, open the position options, and change the Z position to -2800. Bring the audio file into your logo reveal composition, and you are done. Let’s check the final result.
I hope you enjoyed this tutorial on how to create a text formation logo reveal animation in After Effects. Don’t forget to subscribe, hit the like button and comment. It would be great to know your opinions on my tutorials. Also, you can make requests for new tutorials, on interesting effects or animations that you would like to learn. See you soon!


