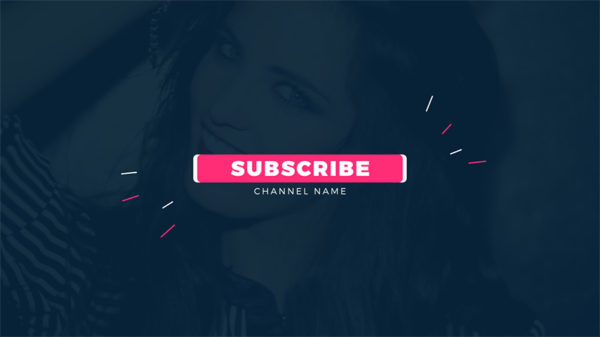
This tutorial is a sequel to the Plexus Background tutorial. You will see how to use the generated background to create an awesome out screen for Youtube videos.
Download the Projec Files Subscribe to my Channel Download the Template
Plexus Youtube End Screen Tutorial Transcript
Hey, welcome back to my new video. This is EZ Tutorials, and for those of you who are the first time in this channel, please consider subscribing.
As I was saying in the previous tutorial, I will show you how to make a beautiful end screen for youtube videos. So, after learning how to make the plexus background, today I will teach you how to create this.
Import the files you need into After Effects. You can download the project files and the template separately, this way you will be able to create this youtube end screen, even if you don’t want to download my template. You can find both links in the description.
Create a new composition and name it: end screen. I’m using a FULL HD 1080 pixels preset, with 30 frames per second, and 22 seconds long.
Bring the plexus background file into your composition. For those who ask how to create this kind of animation, you can click the link from the right upper corner of this screen, and watch the tutorial on this subject.
Select your layer and apply the tint effect to it. Open the Effect Controls panel, and click “Swap Colors”, then, change the black color to this shade of gray. Precompose this layer, and name the new composition plexus.
Create a new solid, of any color, and name it: matte left. make it 1500 pixels width by 3000 pixels height. Move its anchor point to the middle right, Open its rotation options, and change the rotation angle to 45 degrees, then, right click on it, and select: transform, “center in view”. This action will place the anchor point of your layer, right in the middle of your composition.
Duplicate the matte layer, and rename the new one: matte right. Right-click on the new layer, select transform, then click flip horizontal. As you can see, there is a little gap between our two layers. To fix it, select both layers, and open their position options, then, change the Y position of the first layer to 539, and the Y position of the second layer to 541.
Great, now, move to 1 second, and create position keyframes on both layers, then, move back to the first frame, and drag your matte layers to the corners like this, until they are not visible anymore. Select all the keyframes and easy ease them, then, open the Graph Editor, and change their curves like this.
Select the plexus layer and duplicate it, place the new one between the matte layers, then, change on both plexus layers the track matte to alpha matte. Check out your animation, and see how it looks.
Create a new black solid, and name it: slide. Open its rotation options, and change the rotation angle to 75 degrees, then, open the position, and change the X position value to 1510, move to 2 seconds, and create a keyframe here, then, move back to 1 second, and drag your slide layer to the right, until is not visible anymore. Select the keyframes and easy ease them, then open the Graph Editor, and change the curve like this.
Apply the gradient ramp effect to your slider layer, change the white color to a middle shade of gray, Change the black color to a lighter gray, then, change the Y value of the Start of Ramp to 1040. this will create a nice bevel border on our layer.
Create a new shape layer, and name it: circle. Add an ellipse and a stroke to your shape layer. Change the stroke color to this shade of gray. Click on ellipse path 1, and change the size values to 321. Open the position options, and change the values to 514, and 296. Open the layer settings, click add, trim paths. Move to 2 seconds, open trim path 1, change the end value to 0%, and create a keyframe here, then, move to 3 seconds, and change the value to 100%. Select both keyframes and easy ease them.
Bring your logo into the end screen composition, and resize it if you need. Pre-compose it, and name the new composition: logo. Open the scale options, Move to 2 seconds, create a keyframe on the scale, and change the values to 0%, move 10 frames forward, and change the scale values back to 100%, select the first keyframe and easy ease out it, then, alt-click the scale stopwatch, and write this expression:
n = 0;
if (numKeys > 0){
n = nearestKey(time).index;
if (key(n).time > time){
n–;
}
}
if (n == 0){
t = 0;
}else{
t = time – key(n).time;
}if (n > 0 && t < 1){
v = velocityAtTime(key(n).time – thisComp.frameDuration/10);
amp = .1;
freq = 4.0;
decay = 8.0;
value + v*amp*Math.sin(freq*t*2*Math.PI)/Math.exp(decay*t);
}else{
value;
}
Open the position options, and change the values to 514, and 750.
If you have a complex logo, with different colors and details then ignore this step, else, apply the fill effect to your logo layer, and change the fill color to a nice shade of purple. Select the Horizontal Type Tool, and write your tagline. I am using the Gotham font, which is free to download, with 39 pixels size. Move the text anchor point to its middle, then, open the position options and change the values to 514, and 880.
Open the text layer settings, click on animate, and select position. Drag your text to the right, until is not visible anymore, Open the range selector 1, move to 2 seconds, and create a keyframe on offset, then, move to 3 seconds, and change the offset value to 100%.
Check the motion blur box on all your layers, then activate the effect from here. As you can see, the end screen animation starts from a transparent background, so you need to render it with a transparent background, and then use it as an overlay in your projects. If you don’t know how to render it with alpha channel, you can click the link from the right upper corner of the screen to watch a tutorial on this subject.
Now, let’s see our final result. I hope you enjoyed my tutorial on how to create a youtube end screen in After Effects. Don’t forget to subscribe, hit the like button and comment. It would be great to know your opinions on my tutorials. Also, you can make requests for new tutorials, on interesting effects or animations that you would like to learn. See you soon!